Leveraging the Power of Actions in GraFx Studio: A Journey into Interactive Smart Templates

In the dynamic world of web design, JavaScript has been a pivotal game-changer, transforming the static nature of early websites into vibrant, interactive experiences.
This evolution mirrors the innovative journey of CHILI publish's GraFx Studio, where Actions breathe life into smart templates, making them not just visually appealing, but smartly interactive.
Do you want to see the power of Actions in action? Check out my session recording at CREATE '23 EU "The Power of Actions & Invoking the Genie: Creating Actions Using AI".
The Magic of Actions in GraFx Studio
At the heart of GraFx Studio's interactivity are Actions. These powerful elements allow templates to respond dynamically to user input, creating a path of interaction that can range from simple tasks like changing logos and colors via dropdowns, to complex operations like validating phone number formats.
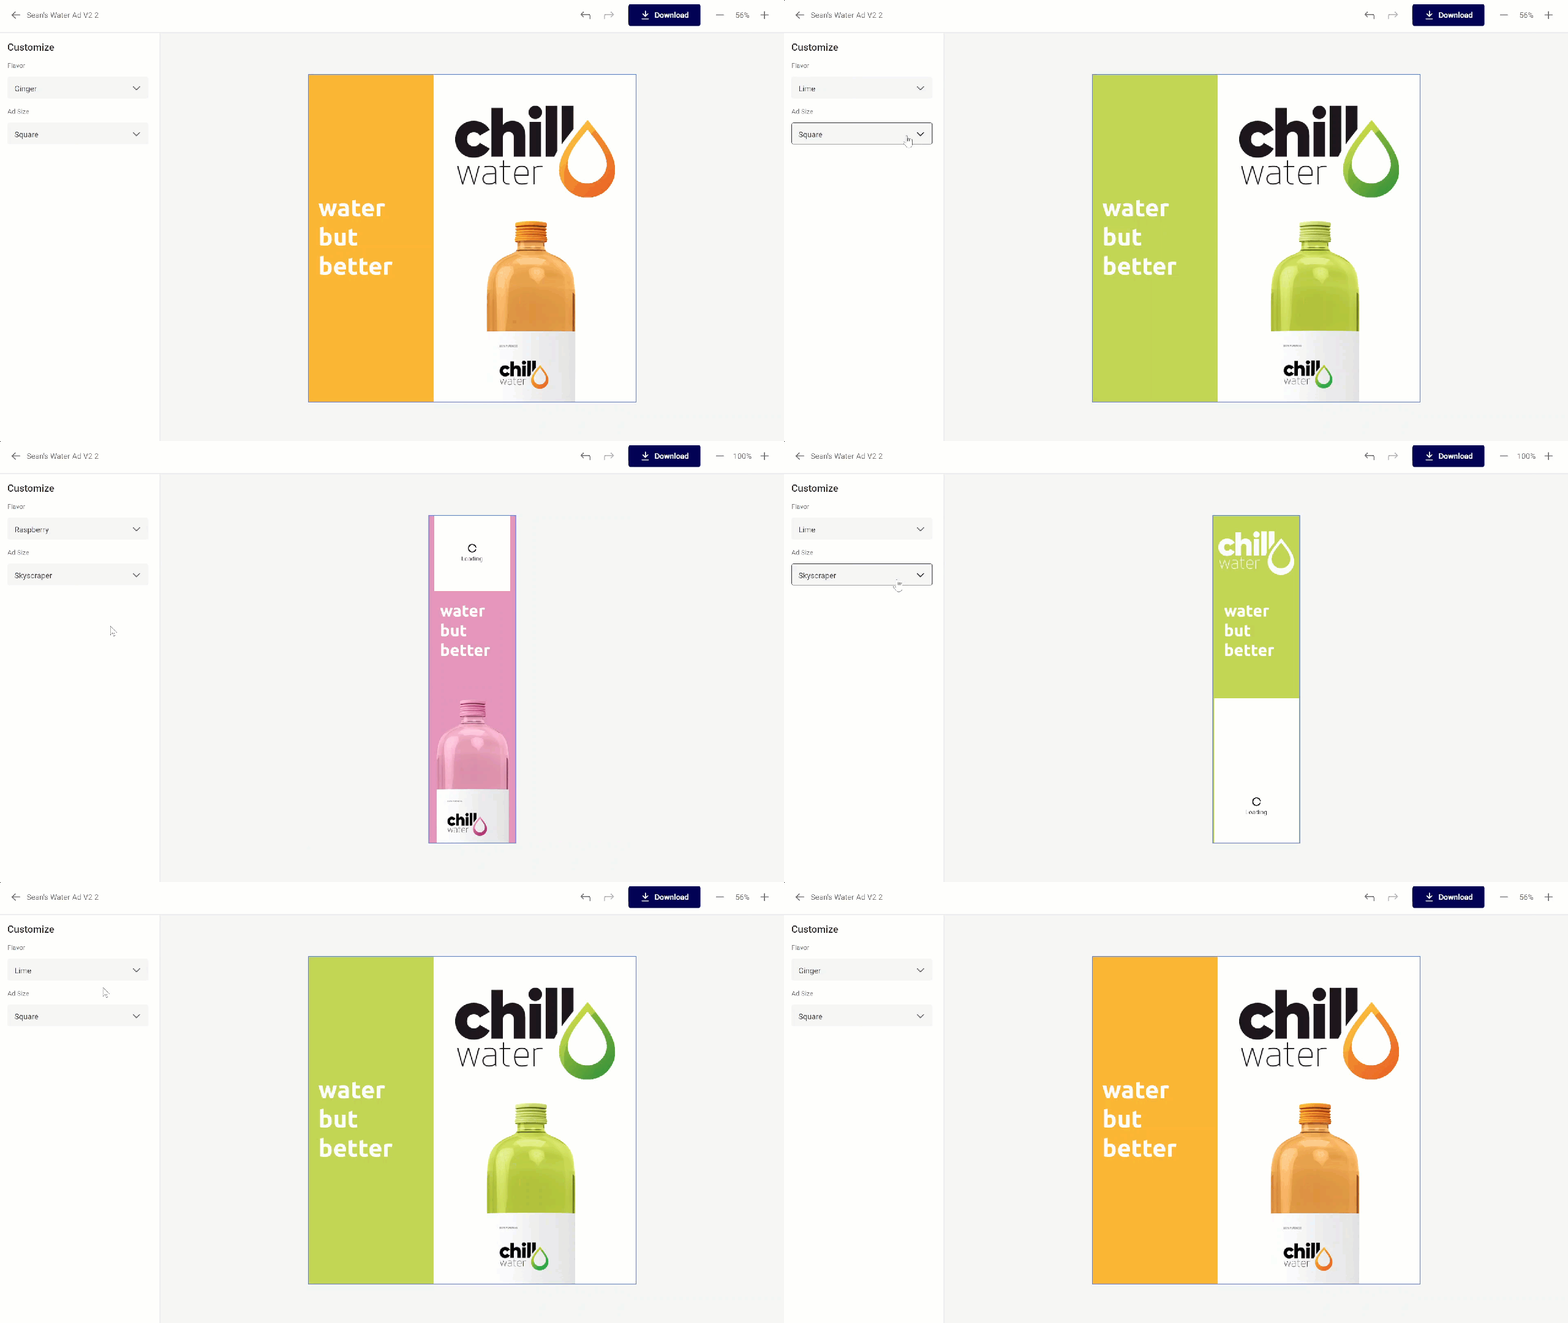
For example, the interactivity of this document was created using Actions.

Understanding the Mechanics: Triggers and Actions
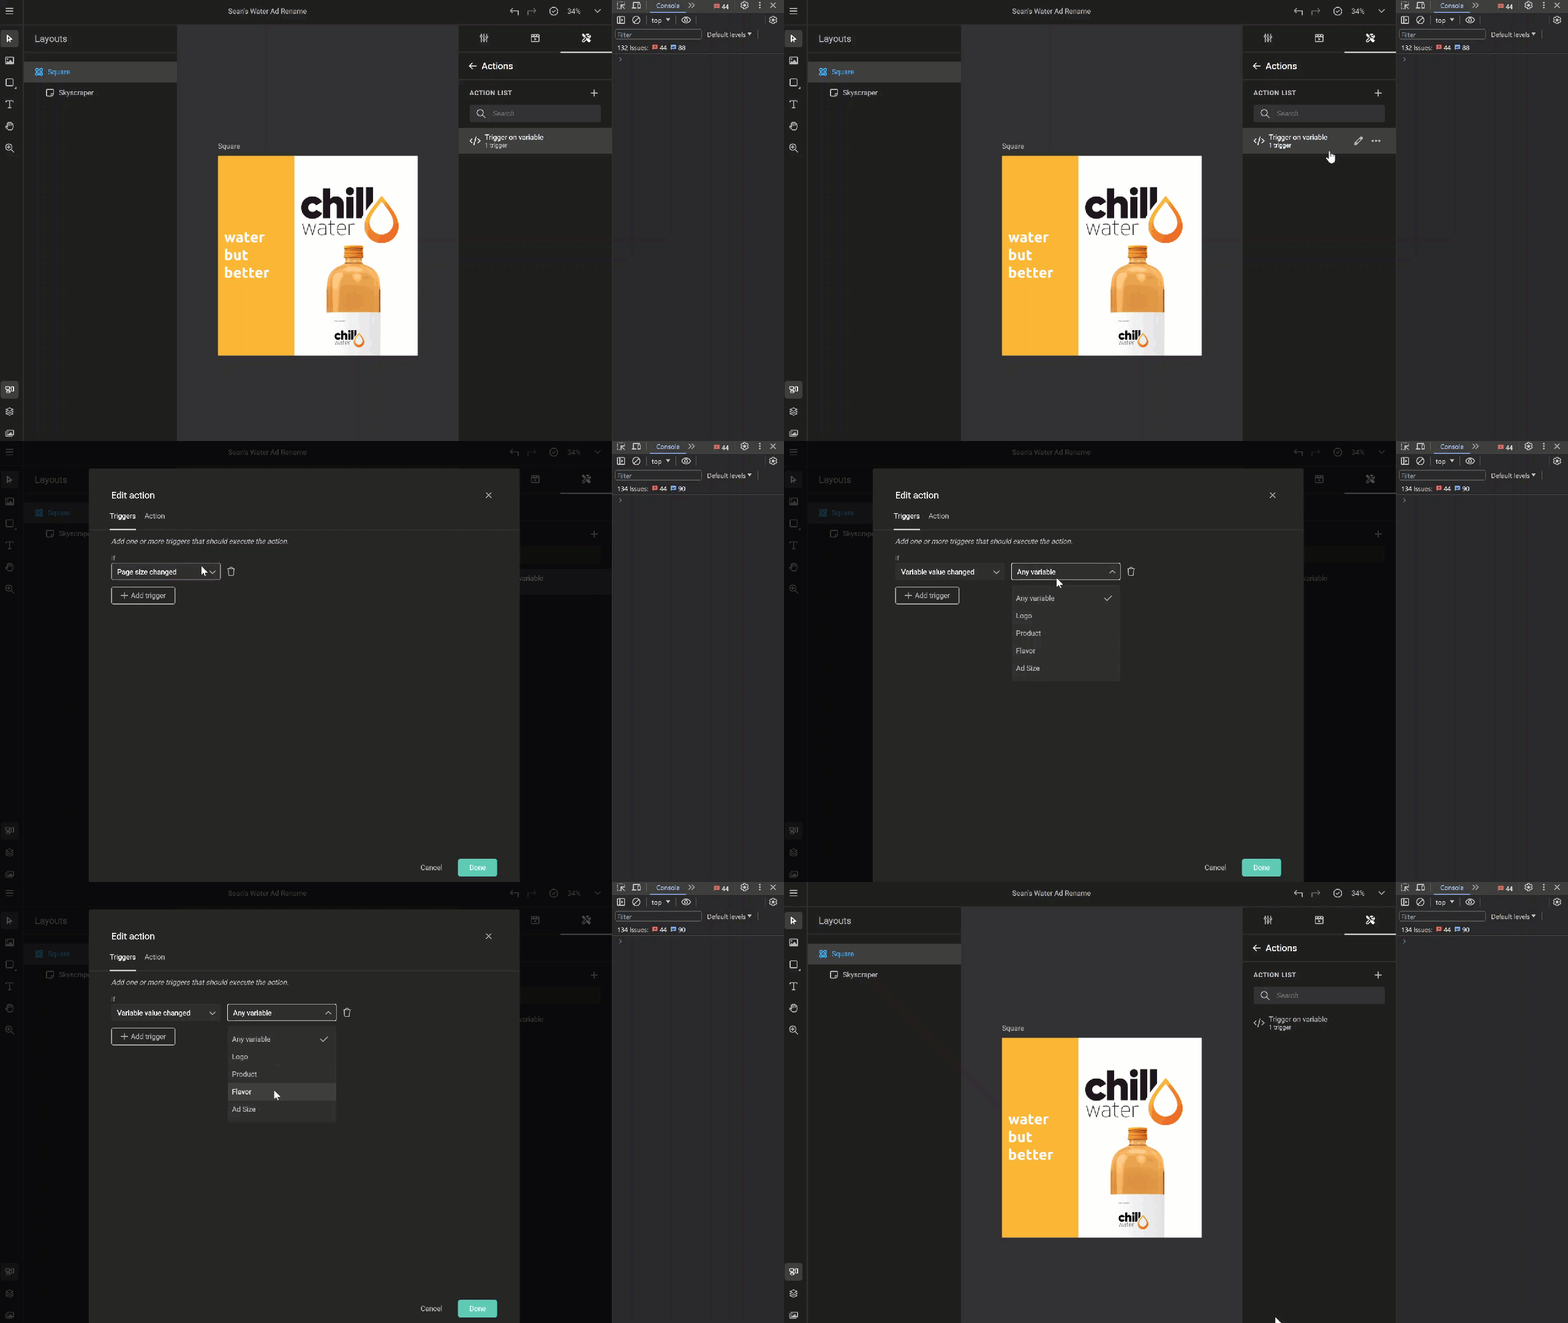
Actions in GraFx Studio operate on a straightforward principle: triggers and consequent actions. You subscribe an Action to a trigger, and upon activation, the Action executes the logic to react. Currently, GraFx Studio offers five triggers:
- Selected Layout Changed: Reacts to the layout changing.
- Frame Moved: Activates on moving, rotating, or resizing frames. You can target specific or all frames.
- Page Size Changed: Though not currently used, it's available.
- Document Loaded: Triggered when a document loads.
- Variable Value Changed: Responds to changes in specific or all variables.

Crafting Efficient Actions: Balancing Complexity and Logic
When developing Actions, the choice and number of triggers are crucial. While you can listen to multiple triggers, caution is advised to avoid circular logic, where an Action inadvertently triggers itself, leading to potential complexity and confusion.
GraFx Studio does block endless circular logic, but it's advisable to start with a single trigger per Action and only add more when necessary.
JavaScript: The Language of Choice
JavaScript's popularity, ease of learning, and abundant resources makes it the ideal language for writing Actions in GraFx Studio.
This choice marks a significant evolution from GraFx Publisher, where Actions relied more on a GUI-based approach, which, despite seeming user-friendly, often became cumbersome to manage and debug.
In contrast, GraFx Studio not only offers a well-documented JavaScript API but also includes a helpful Action editor, with friendly error messages, making the development process more intuitive and efficient.
JavaScript Basics in 10 Minutes
Fear not the unfamiliar! You don't need to be a JavaScript wizard; mastering the basics is more than enough.
If you need a wizard, you should try having GraFx Genie, an AI powered assistant, write the JavaScript for you: Unleashing the Power of AI in GraFx Studio with GraFx Genie
However, you can venture into JavaScript yourself by knowing four things:
- Variables
- console.log
- Helper Functions
- is/else Logic
Variables
Variables start off with a simple word "let". Then you name the variable any name you want using letters and numbers. For example, let's call our variable "a". Then you give the variable a value, in this case a String that reads "string"
You can amke more than one variable; you just need to give it a different name.
You can set another variable c to the value of those two variables added.
console.log
An essential tool to know is console. log which allows you log your results to the console in dev tools in your browser.
So, if we want to log the value of c
If you have never used the dev tools before, you need to check out the console, which can be opened using CTRL + SHIFT + I.
I strongly suggest keeping your console open when testing Actions.
Not only can you log out your messages with console.log but you will see any errors from testing Actions.
Take not that Studio provides friendly error messages that tell you the name of the Action that has an error, and the reason for that error.
We can see in the error image that the offending action is called Ad Size Change and that it failed because a document variable with the name 'ad size' does not exist. We must have used the wrong document variable name.
Helper Functions
There are pre-built functions in GraFx Studio that perform various tasks, ones for getting data and ones for setting data. Their usage is straightforward; you just need to:
- Name a variable
- Call the correct get or set function
- Passing the requirements
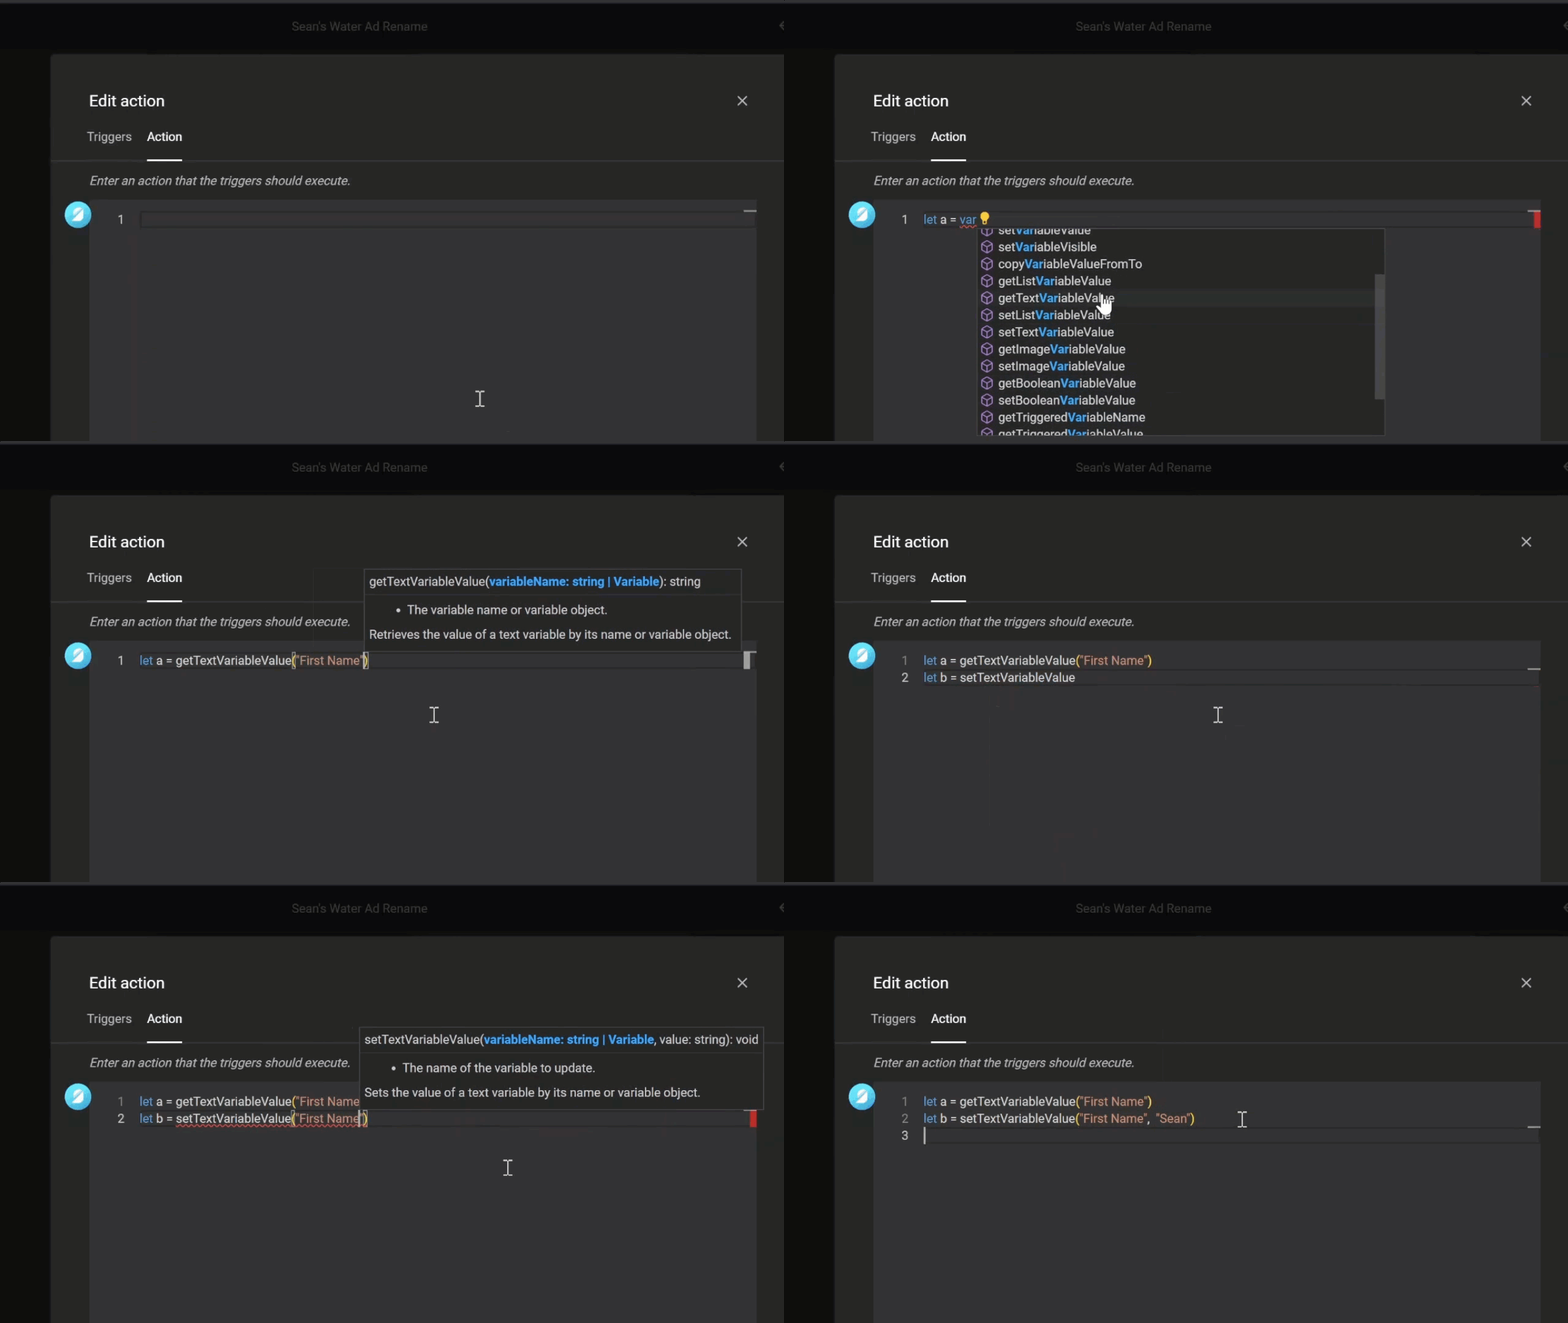
Example getting the value of the document variable First Name and Last Name:
We can then use those values to set the value of the document variable Display Name:
Now you might be wondering how I remember all those function names and what is required. The secret is: I do not 😉.
Instead, the Action editor helps intelligently by telling you the name of functions as you type and what is required for those functions.
You just basically need to type what you want to happen, and the Action editor will find it.

if/else Logic
Finally, we have if/else logic statements.
An if statement is simple to use. You start off with an "if" and then you add a parenthesis. Then, inside the parenthesis you add any check that will equate to true or false. Finally, we add brackets, which will contain all the code that will run if the if statement is true
Take notice that we use three equal signs === instead of one = used earlier.
Simply put, = is used to give a value to a variable, like saying "this equals that."
On the other hand, === is used to compare values to see if they are the same.
You can use more than one if statement. For example, changing the background based on the season selected:
When there is an if statement you can also put an else statement. The else code will always run if the if statement is not equal.
Be careful as an else statement can create confusion if you are not used to using if/else. I suggest sticking to if statements until you are used to the if/else flow.
Action Editor: Your Intelligent Assistant
Overall, the Action editor in GraFx Studio simplifies your scripting journey. It knows the syntax, suggests functions as you type, and guides you with interactive documentation. It also checks for syntax errors.
Building Interactive Documents: Practical Tips and Strategies
While scripting Actions, adopt a gradual, test-as-you-go approach. Regularly use console.log for logging and add comments for future reference.
The editor won't flag errors related to document-specific names, so a consistent naming scheme is crucial. You do not want to change the name of layout and then must go and update all your JavaScript.
Navigating Complexity in Interactive Design
Interactive documents can grow complex, especially with unique dynamic requirements. In such cases:
- Allocate ample time for exploring solutions.
- Don't fear mistakes; rewriting code is part of the process.
- Break down the problem into smaller, manageable Actions.
- Keep solutions simple, even if it means bending some rules.
Conclusion
GraFx Studio, empowered by JavaScript, opens a realm of possibilities in creating smart, interactive templates. By understanding and utilizing Actions, triggers, and basic JavaScript, you can revolutionize the way documents interact with users. Embrace this journey with curiosity and creativity, and watch your designs come alive with intelligence and interactivity.
Eager to transform your web design projects? Start your journey with GraFx Studio today! Explore its dynamic capabilities and see how JavaScript can revolutionize your designs.
Do you want to see the power of Actions in action? Check out my session recording at CREATE '23 EU "The Power of Actions & Invoking the Genie: Creating Actions Using AI".
CREATE,
Product
Sean Crowe
Nov 28, 2023


